
Published by BuzzSkito Mosquito & Tick Control
Published October 11, 2026 · Drafted with AI assistance and fact-checked against the sources listed below
How do you mouse-proof your house?
You mouse-proof a house by closing every opening about 1/4 inch (6 mm) or wider in its outer shell with a gnaw-resistant material, and by trapping the mice that are already inside. The CDC's seal-up guidance says a mouse can fit through a hole the width of a pencil, and University of California IPM calls exclusion the most successful and permanent form of house mouse control.
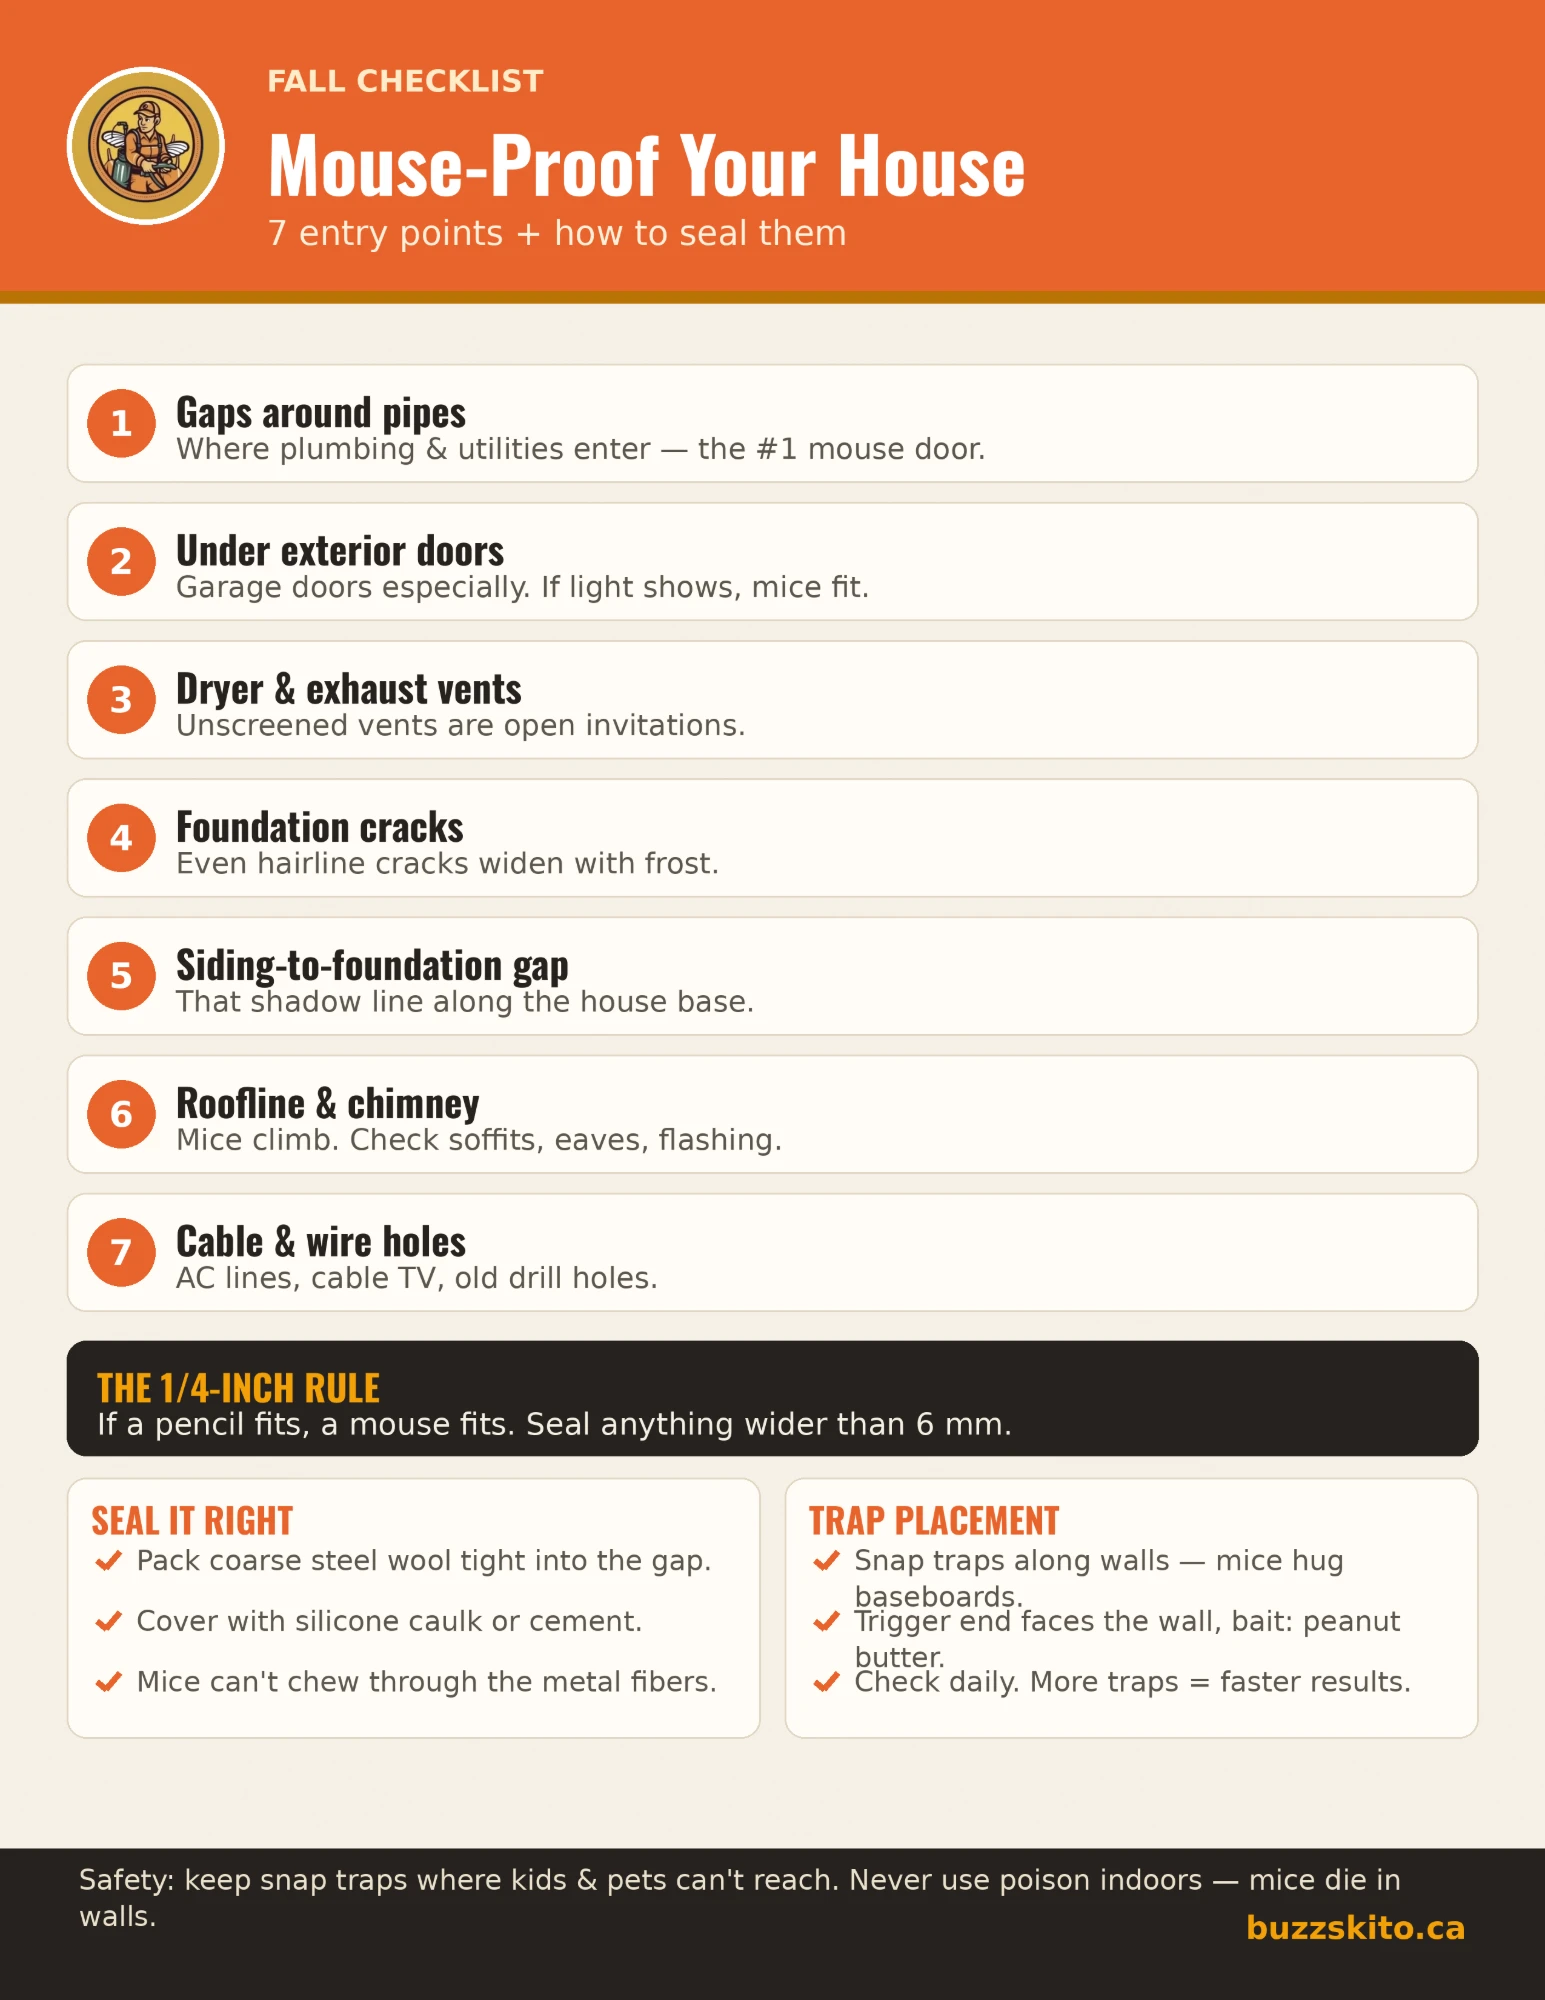
This page follows the one-page checklist above in order, and one note further down lists where the graphic and the sources differ. For species, signs and the wider control plan, start with the complete reference on mice and mouse control.
Why is fall the time to mouse-proof?
Fall is when mice move indoors. UC IPM says that where house mice live outdoors, they frequently enter homes in autumn when nighttime temperatures become colder. Winter does not clear them out afterward: the University of Nebraska's rodent-proof construction guide notes that house mice can survive and reproduce at temperatures down to 24°F (about -4°C) when they have adequate food and nesting material.
Sealing first also makes the rest last: the Nebraska guide calls rodent-proof construction the first and most important step, and reports that rodents reinvade through unsecured openings after a control program. Aim to finish the outdoor work in early fall, before nights turn cold.
What are the 7 entry points, and how do you seal each one?
The seven entry points are gaps around pipes, the space under exterior doors, vents, foundation cracks, the joint where siding meets the foundation, the roofline, and cable and wire holes. Each appears in the CDC's lists of where to look or in the Nebraska guide. Neither source ranks them, so check all seven.
1. Gaps around pipes
Every pipe that passes through an outside wall or a floor leaves a gap unless someone has sealed it. The CDC says to look around the pipes under sinks and washing machines, the pipes leading to water heaters and furnaces, and all electrical, water, gas and sewer lines. The Nebraska guide says common openings occur around pipes and electrical conduits or cables; the checklist's phrase, the number one mouse door, goes further than either source. Start under the kitchen and bathroom sinks, then find the same pipes outside. The fix is under Seal it right.
2. Under exterior doors
A door is mouse-tight when the space between its bottom edge and the threshold is less than 1/4 inch, the Nebraska guide's figure, and UC IPM confirms that a house mouse can squeeze under a gap 1/4 inch tall. Daylight under a door is a reason to measure, not a measurement: light shows through a gap of any width. Slide the pencil along the bottom of each exterior door and across both bottom corners of the garage door.
Nebraska's fixes are to build up the threshold, or to fit flashing or a metal channel on the door's lower edge, with the flashing reaching to within 1/8 inch of the door's edge at the sides and bottom. Rubber and vinyl alone are the weak choice, because rats and mice can quickly gnaw through rubber or vinyl weather stops. The CDC says to seal garages and outbuildings too, and a separate guide shows how the corner gap on a garage door gets sealed.
3. Dryer and exhaust vents
Vents need two different treatments, and the clothes dryer vent is the one you should not screen. Attic and crawl space vents are on the CDC's outdoor list, and the Nebraska guide covers ventilation openings like these with galvanized hardware cloth: 24 gauge with 1/4 by 1/4 inch mesh excludes mice. It cautions that mesh finer than 1/2 by 1/2 inch significantly reduces airflow and that small-mesh screen can clog with dust or ice, so recheck screened vents each season.
A dryer vent carries lint, and Nebraska warns that improper screening hastens lint build-up and increases the likelihood of fires. Its steps are to make sure the exhaust pipe meets Consumer Product Safety Commission standards, to seal any gap between the pipe and the wall, and to consider a vent cover with a floating ball that closes when the dryer stops. A US Department of Energy job aid for venting a clothes dryer puts it in one line: the termination has a backdraft damper and no cage. These sources do not cover kitchen and bathroom exhaust hoods separately; seal around the duct and keep the flap closing freely.
4. Foundation cracks
Repair foundation cracks with concrete or masonry grout, the Nebraska guide's instruction; UC IPM likewise says to seal foundation cracks with metal or concrete. A true hairline crack is far narrower than the 1/4 inch a mouse needs, so it is not an entry point as it stands. Nebraska's reason for not ignoring small crevices is gnawing: given an edge, rodents can quickly enlarge an opening. None of the sources used here says frost widens cracks enough to admit mice, so read that line on the checklist as a prompt to recheck each fall.
Also check where the CDC points on its outdoor list, between the foundation and the ground. Nebraska recommends a clean, weed-free strip 3 feet wide around the foundation to discourage burrowing.
5. Siding-to-foundation gap
The joint where the wall sits on the foundation is a known weak point. The Nebraska guide says gaps or flaws often exist where the wall framing or siding meets the foundation, giving rodents easy access. For the open ends of metal siding it uses concrete, angle iron or heavy-duty flashing, and the CDC's matching line is to use flashing around the base of the house. Look up behind the bottom edge of the siding with a flashlight and run the pencil along the gap.
Brick walls are a separate case. The open joints along the bottom course, called weep holes, are drainage openings, and none of these sources says how to mouse-proof them, so ask a mason or a pest professional before blocking one.
6. Roofline and chimney
Mice reach the roofline easily. UC IPM describes house mice as excellent climbers that can run up any rough vertical surface and along wire cables, and the Nebraska guide adds vines, shrubs and trees as routes onto a building; a separate guide covers which wall surfaces mice can and cannot climb. The CDC's outdoor list names the roof among the rafters, gables, eaves and soffits, and its indoor list adds the attic and the area around the fireplace. Cover openings with hardware cloth or sheet metal, and thin or remove plants growing next to or up the building, as UC IPM advises.
Check the flashing around the chimney as well, though none of these sources gives a chimney-specific repair. Leave gaps you cannot reach safely to a roofer or a pest professional.
7. Cable and wire holes
Treat every wire hole like a small pipe hole. The CDC's outdoor list includes the holes for electrical, plumbing, cable and gas lines, and the Nebraska guide says to seal gaps where pipes, wires or similar objects enter a building with gnaw-resistant materials. Check the air conditioner lines, the cable or satellite entry, the electrical service and any hole left by equipment that has been removed. Mice travel along wires and cables, so a hole high on a wall counts as much as one near the ground.
Check indoors too: the CDC's inside list
- Kitchen. Inside, under and behind the cabinets, and behind appliances.
- Closets. Floor areas, especially the corners.
- Plumbing. Around the pipes under sinks and washing machines, and the pipes leading to the water heater and furnace.
- Vents and drains. Around floor air vents, dryer vents and floor drains in the basement or laundry room.
- Utility lines. Around all electrical, water, gas and sewer lines.
- Top and bottom of the house. Inside the attic, and in the basement or crawl space.
- Edges. Around the fireplace, windows and doors, and along the joint between the floor and the wall.
What is the 1/4-inch rule?
The 1/4-inch rule says that any gap a pencil slides into is big enough for a mouse. The CDC states it almost word for word: mice can fit through a hole the width of a pencil, 1/4 inch or 6 mm in diameter. The university sources land in the same place with slightly different wording.
| Source | Gap a mouse can use |
|---|---|
| CDC | A hole the width of a pencil, 1/4 inch (6 mm) in diameter |
| University of California IPM | Openings as small as 1/4 inch; under a gap 1/4 inch tall, or through an opening 3/8 inch wide |
| University of Nebraska | Slightly more than a 1/4-inch gap; holes as small as 1/4 inch in diameter |
Use the rule as a test instead of a guess: carry a standard pencil, try it in every gap, and seal any gap it enters. A snug fit still counts, because the CDC's figure is the pencil's own width. The Nebraska guide also says not to ignore smaller crevices, because gnawing can quickly enlarge them, so a gap just under the limit that is edged with wood, vinyl or foam is worth sealing too.
Seal it right: how do you close a hole so it stays closed?
Pack the hole with metal wool, lock the wool in with caulk, and use rigid metal or masonry for anything larger. The checklist's version, steel wool held in with caulk, matches the CDC's method for small holes; cement is on the CDC's list for larger holes. The university sources add one correction: UC IPM says steel wool pads make good temporary plugs but may rust, and the Nebraska guide says coarse steel wool will eventually rust and names copper or stainless steel wool for openings under 3/4 inch. A separate guide covers how long a steel wool plug lasts and what to use in its place.
- Make sure the hole is not in use. The Nebraska guide warns against closing an opening an animal may be using until you know what it is and have a control plan. If there are fresh droppings or gnaw marks, start trapping first.
- Wedge in the metal wool. Clear out loose filler, then, wearing work gloves, push copper or stainless steel wool in tightly with a screwdriver until the whole depth is filled. Coarse steel wool works as a temporary plug.
- Lock it in with caulk. The CDC says to put caulk around the steel wool to keep it in place. The sources name no type of caulk, so choose one labeled for the surface and, outside, for exterior use.
- Cover larger holes with rigid material. Cut 24-gauge hardware cloth with 1/4 by 1/4 inch mesh, or galvanized sheet metal of 24 gauge or heavier, to overlap the opening and fasten it to solid material.
- Patch masonry with masonry. Use concrete or masonry grout for cracks and holes in a foundation.
- Recheck each fall. Steel wool rusts, a plug can come out of place, and the Nebraska guide notes that rodents may gnaw new entrances.
| Material | Use it for | Limits |
|---|---|---|
| Copper or stainless steel wool | Openings under 3/4 inch (Nebraska) | Must be wedged in tightly |
| Coarse steel wool plus caulk | Small holes (CDC) | Temporary; rusts over time (UC IPM, Nebraska) |
| Hardware cloth, 24 gauge, 1/4 by 1/4 inch mesh | Vents and larger holes | Fine mesh reduces airflow and can clog |
| Galvanized sheet metal, 24 gauge or heavier | Door bottoms; larger holes | Table I lists aluminum separately, at 22 gauge for frames and flashing, and the guide says rodents can gnaw aluminum sheeting |
| Cement, concrete or masonry grout | Foundation cracks; larger holes | Rodents can gnaw concrete block, per Nebraska |
| Spray foam, rubber, vinyl, plastic screening, wood | Not as the barrier | Gnawable; ineffective for plugging mouse holes (UC IPM) |
Gauges and mesh sizes are from Table I of the University of Nebraska guide.
The sources split on spray foam: the CDC allows it in place of caulk to hold steel wool, UC IPM calls expanding foam ineffective for plugging mouse holes, and Nebraska advises against foam in sunlight because ultraviolet light degrades it. Foam can hold a metal plug; the metal stops the mouse.
Trap placement: where do traps go for mice already inside?
Set snap traps against walls where you have seen droppings or gnawing, with the baited end touching the wall. The CDC's trapping guidance says to place the trap so it forms a T with the wall, because rodents prefer to run next to walls and other objects, and UC IPM says to place traps close to walls so mice pass directly over the trigger. Run traps while you seal.
- Where. Behind the stove and refrigerator, in the back of cabinets and drawers, and in attics, basements and crawl spaces (CDC).
- How many. No more than about 10 feet apart where mice are active, because house mice seldom venture more than 30 feet from the nest; pairs set 1 to 2 inches apart can catch more of the mice that jump over obstacles (UC IPM).
- Bait. A small amount of chunky peanut butter or mutton fat, the two baits the CDC says work best. Too much lets a mouse remove the bait without springing the trap, and a ball of cotton wool or dental floss can also work, because breeding females are highly motivated to build nests (UC IPM).
- Checking. Daily, disposing of any dead rodent right away (CDC).
- How long. Check the bait weekly and refill or move it for at least 15 days; a week with no captures and no new signs is the CDC's end point.
UC IPM's advice to use enough traps to make the trapping period short and decisive backs the checklist's line that more traps mean faster results. The comparison of mouse trap types and how to set each one explains why the CDC advises against glue and live traps.
What are the risks to pets and children?
Traps and bait are where the sources place the risk to pets and children; for the sealing materials they give no warning. The table sets out what they say about each method.
| Method | Risk the sources name | How to lower it |
|---|---|---|
| Metal wool, hardware cloth, sheet metal, caulk | Not pesticides; these sources give no pet or child warning | Follow the caulk or foam label; pick up wire and metal wool offcuts |
| Snap traps | Spring-loaded; the CDC says to always keep traps out of reach of children and pets | Set them behind the stove or refrigerator and in closed-off spots a child or pet cannot get into |
| Peanut butter bait | Can pose allergy risks to people in some situations (UC IPM) | Bait with a ball of cotton wool or dental floss instead |
| Glue boards | Not for use where children, pets or wildlife can contact them (UC IPM); the CDC advises against glue traps | Leave them out of the plan |
| Poison bait | Can be dangerous for people and animals (CDC); all rodenticides are toxic to people, pets and wildlife (UC IPM) | Trap first; if used, only a ready-to-use bait station, as its label directs, out of reach |
The checklist says never to use poison indoors because mice die in the walls. The reason holds up: UC IPM says house mice tend to stay within 30 feet of the nest, so rodenticide use will often result in mice dying inside the structure. The word never goes further than the rules do: the EPA's page on rodenticide restrictions says consumer products are ready-to-use bait stations holding block or paste bait, labeled for use indoors, or indoors and outdoors within 50 feet of buildings, and the CDC reserves poison for infestations that persist. Trapping first is the cautious reading of all three; the guide to mouse poisons and the EPA's consumer rules covers what to do if a child or pet gets into bait.
Sealing work also puts you close to droppings and nests. The CDC's cleanup instructions say not to vacuum or sweep rodent urine, droppings or nesting materials, because diseases are mainly spread from rodents to people who breathe in contaminated air. Wear rubber or plastic gloves, wet the droppings with a bleach solution or an EPA-registered disinfectant, and wipe them up; the full method is in how to remove mice and clean up after them. The CDC advises talking to a healthcare provider if you think a recent illness may be due to a rodent-borne disease.
Printable fall mouse-proofing checklist
The card below holds eleven checks: one walk around the outside of the house, then one pass indoors.
Print or save
Fall mouse-proofing checklist
Print this, take a pencil and a flashlight, and walk the outside of the house in early fall, before nights turn cold.
- Pencil test: a mouse fits through a hole the width of a pencil, 1/4 inch (6 mm). Seal every gap the pencil slides into.
- Pipes, cables and wires: wedge copper or stainless steel wool into the gap around each line and seal over it with caulk.
- Exterior doors: the gap under each door, including the garage door and its corners, should be less than 1/4 inch. Build up the threshold or add a metal edge.
- Dryer vent: make sure the flap closes and seal around the duct. No screen or cage, because lint build-up is a fire hazard.
- Attic and crawl space vents: cover with 24-gauge hardware cloth, 1/4 by 1/4 inch mesh, and keep it clear.
- Foundation: patch cracks and holes with concrete or masonry grout, and check where the foundation meets the ground.
- Siding-to-foundation gap: look behind the bottom edge of the siding and close gaps with heavy-duty metal flashing, angle iron or concrete.
- Roofline: check rafters, gables, eaves and soffits, and cut back plants that touch or climb the house.
- Larger holes: hardware cloth, sheet metal of 24 gauge or heavier, or cement. Spray foam, rubber, vinyl and wood are not mouse barriers.
- Traps indoors: snap traps no more than about 10 feet apart, baited end against the wall, a small amount of peanut butter. Check daily.
- Recheck every fall: plain steel wool rusts, and mice can gnaw new openings.
Keep traps and any bait out of reach of children and pets. Do not sweep or vacuum droppings; wet them with disinfectant and wipe them up wearing gloves.
buzzskito.ca
When does mouse-proofing fail, and when should you call a professional?
Mouse-proofing fails when one opening is missed, when a plug rusts or comes out of place, or when mice arrive another way. The Nebraska guide says plainly that rodent-proofing will not guarantee a rodent-free building: rodents may gnaw new entrances or be carried in inside a box or an appliance. Sealing also removes no mouse that is already indoors; the traps do that.
Call a professional when trapping has not ended the problem, when the gaps are out of safe reach, or when you cannot tell what animal is using a hole. The CDC's own next step after trapping fails is a poison bait station or professional help, and it says to contact a professional rodent service when rodents have got into heating and cooling ducts. A separate guide explains what a mouse exterminator does on a job and how to choose one.
This guide is general educational information, not medical advice. If you have symptoms or concerns after a bite or exposure, contact a healthcare provider.
Frequently Asked Questions
What time of year do mice come into the house?+
Mostly in fall. University of California IPM says that where house mice live outdoors, they frequently enter homes in autumn when nighttime temperatures become colder. Cold weather does not remove them afterward: the University of Nebraska notes that house mice can survive and reproduce at temperatures down to 24 degrees Fahrenheit if they have adequate food and nesting material. UC IPM adds that house mice with plentiful, stable resources can reproduce year-round, so a house that is open in October can have mice in any month. Sealing in early fall, before nights turn cold, gets ahead of that move.
Can I put a screen over my dryer vent to keep mice out?+
No, not a screen or a cage. The University of Nebraska's rodent-proofing guide warns that improper screening of a clothes dryer vent hastens lint build-up and increases the likelihood of fires, and a US Department of Energy job aid for dryer venting specifies a termination with a backdraft damper and no cage. Nebraska's alternative is to make sure the exhaust pipe meets Consumer Product Safety Commission standards, seal any gap between the pipe and the wall, and consider a vent cover with a floating ball that closes when the dryer stops. Check your local building code before changing the vent hood.
Does spray foam keep mice out?+
Not by itself. University of California IPM lists insulating expanding foam, along with rubber, vinyl, plastic screening and wood, among the gnawable materials that are ineffective for plugging holes used by house mice. The CDC does mention spray foam, but as an alternative to caulk for holding steel wool in place inside a small hole, so the metal is the barrier. The University of Nebraska adds that foam should not be used where it will be exposed to sunlight, because ultraviolet light degrades it. Use foam to stop a draft or hold a metal plug, and rely on metal wool, hardware cloth, sheet metal or cement to stop the mouse.
Will sealing holes trap mice inside my house?+
It can, which is why sealing and trapping go together. The University of Nebraska's guide assumes a structure is free of animals before its openings are closed, and says that if there is any doubt about whether a hole is in use, it should stay open until the animal has been identified and a control plan chosen. For mice, that plan is snap traps set indoors along walls and checked daily. The CDC treats a full week with no captures and no new signs of rodents as the point at which they are gone, so keep traps set through that week after the last hole is sealed.
How many mouse traps should I set?+
More than most people expect. University of California IPM says to use enough traps to make the trapping period short and decisive, and to space them no more than about 10 feet apart in areas where mice are active, because house mice seldom venture more than 30 feet from their nest and food supply. It adds that pairs of traps set 1 to 2 inches apart can catch mice that jump over obstacles. The CDC says to check traps daily, and to check the bait every week and refill or move it as needed for at least 15 days.
Can I sweep up mouse droppings I find while sealing?+
No. The CDC says not to vacuum or sweep rodent urine, droppings or nesting materials, and explains that diseases are mainly spread from rodents to people when they breathe in contaminated air. Its method is to put on rubber or plastic gloves, spray the droppings with a bleach solution or an EPA-registered disinfectant until very wet, let it soak for 5 minutes or as the disinfectant label directs, and wipe up with paper towels. The bleach solution it gives is 1.5 cups of household bleach in 1 gallon of water. Talk to a healthcare provider if you think a recent illness may be due to a rodent-borne disease.
Sources
- How to Seal Up to Prevent Rodents — Centers for Disease Control and Prevention
- How to Trap Up to Remove Rodents — Centers for Disease Control and Prevention
- How to Clean Up After Rodents — Centers for Disease Control and Prevention
- Pest Notes: House Mouse (UC ANR Publication 7483) — University of California Statewide IPM Program
- Rodent-Proof Construction — Structural (NebGuide G1530) — University of Nebraska-Lincoln Extension
- Restrictions on Rodenticide Products — US Environmental Protection Agency
- 17-1 Vent a Clothes Dryer: Job Aid for Clothes Dryer to the Exterior Badge — US Department of Energy, State and Community Energy Programs
How this guide was made: it was researched and drafted with AI assistance from the sources listed above. A second, independent AI pass then checked each factual claim against those sources. Found an error? Email support@buzzskito.ca.